Did you previously create a document and you added a bunch of columns? Or did someone send you a document to edit, and it would look better with fewer columns?
Word provides you with a number of tools to format a document as needed, but not everyone uses all of those tools all the time. So when you encounter something new, it can be tricky to find the setting that lets you change or remove that formatting option. Our guide below will show you how to change the number of columns in a Word document if you need to use fewer columns than what you currently have.
How to Decrease the Number of Columns in Word
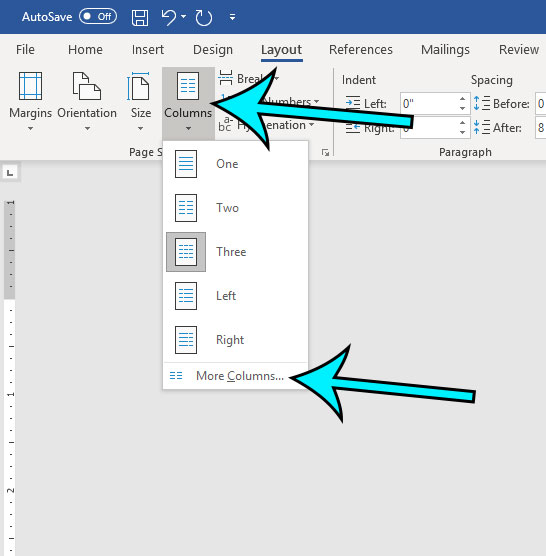
The steps in this article were performed in Microsoft Word for Office 365, but will also work in earlier versions of Word as well. The document that I am using in this example has three columns, and I am going to reduce it to two columns.
Step 1: Open your document in Word.
Step 2: Click the Layout tab at the top of the window.

Step 3: Click the Columns button, then select the number of columns that you want the document to have.

If the number of columns you want is greater than 3, then select the More Columns option, which will bring up the menu below.

You can then click inside the Number of columns field, adjust it accordingly, then click the OK button.
Does your document have a lot of other formatting options that you want to remove? Find out about a tool in Word that will let you quickly remove formatting from a selection so that you can restore it to the default text settings.
Matthew Burleigh has been a freelance writer since the early 2000s. You can find his writing all over the Web, where his content has collectively been read millions of times.
Matthew received his Master’s degree in Computer Science, then spent over a decade as an IT consultant for small businesses before focusing on writing and website creation.
The topics he covers for MasterYourTech.com include iPhones, Microsoft Office, and Google Apps.
You can read his full bio here.