While a lot of the documents that you create in applications like Microsoft Word or Google Docs are going to be on the default paper size, you may occasionally need to use a different one.
Whether you are making a banner or flyer that is going to be much larger, or you need to put something on legal paper, or tutorial on how to change paper size in Google Docs will show you how to accomplish it.
if you’ve been curious about using your voice to type a document, then our Google Docs voice typing app tutorial will show you how to do it on your computer or mobile device.
Use these steps to change the size of your paper in Google Docs.
Step 1: Sign into Google Drive and open your document.
Go to https://drive.google.com to access your documents.
Step 2: Click the “File” tab.
The File tab is at the top-left of the window.
Step 3: Select “Page setup”.
It’s near the bottom of the menu.
Step 4: Click the “Paper size” dropdown menu and choose the paper size.
There are a number of different paper size options available.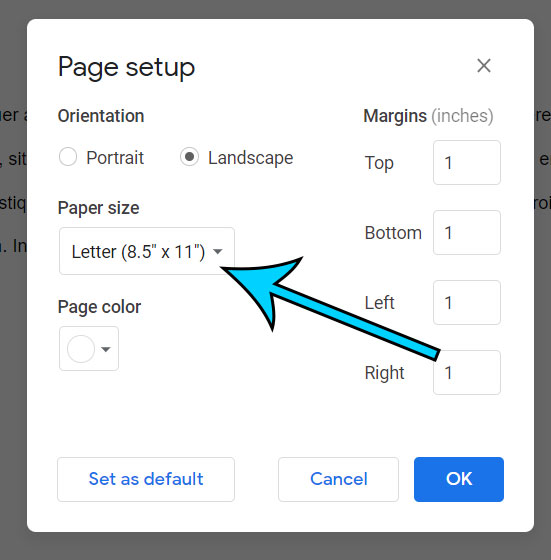
Step 5: Click the “OK” button.
You could also click the “Set as default” button if you wish to make this the default paper size for all future documents, too.
Note that electing to make this the default will also cause any other changes on this menu to apply to those new documents as well. For example, if you changed the margins, that would apply as well.
Changing the default paper size will only affect future new documents. It won’t change the size of the paper on any existing documents.
Matthew Burleigh has been a freelance writer since the early 2000s. You can find his writing all over the Web, where his content has collectively been read millions of times.
Matthew received his Master’s degree in Computer Science, then spent over a decade as an IT consultant for small businesses before focusing on writing and website creation.
The topics he covers for MasterYourTech.com include iPhones, Microsoft Office, and Google Apps.
You can read his full bio here.